How to connect to the VSC from a windows machine
At first a vpn-connection to your university has to be established. The ZID help pages of the respective university explain how a vpn client can be installed.
There are several different ways how to connect to the Cluster.
File transfer
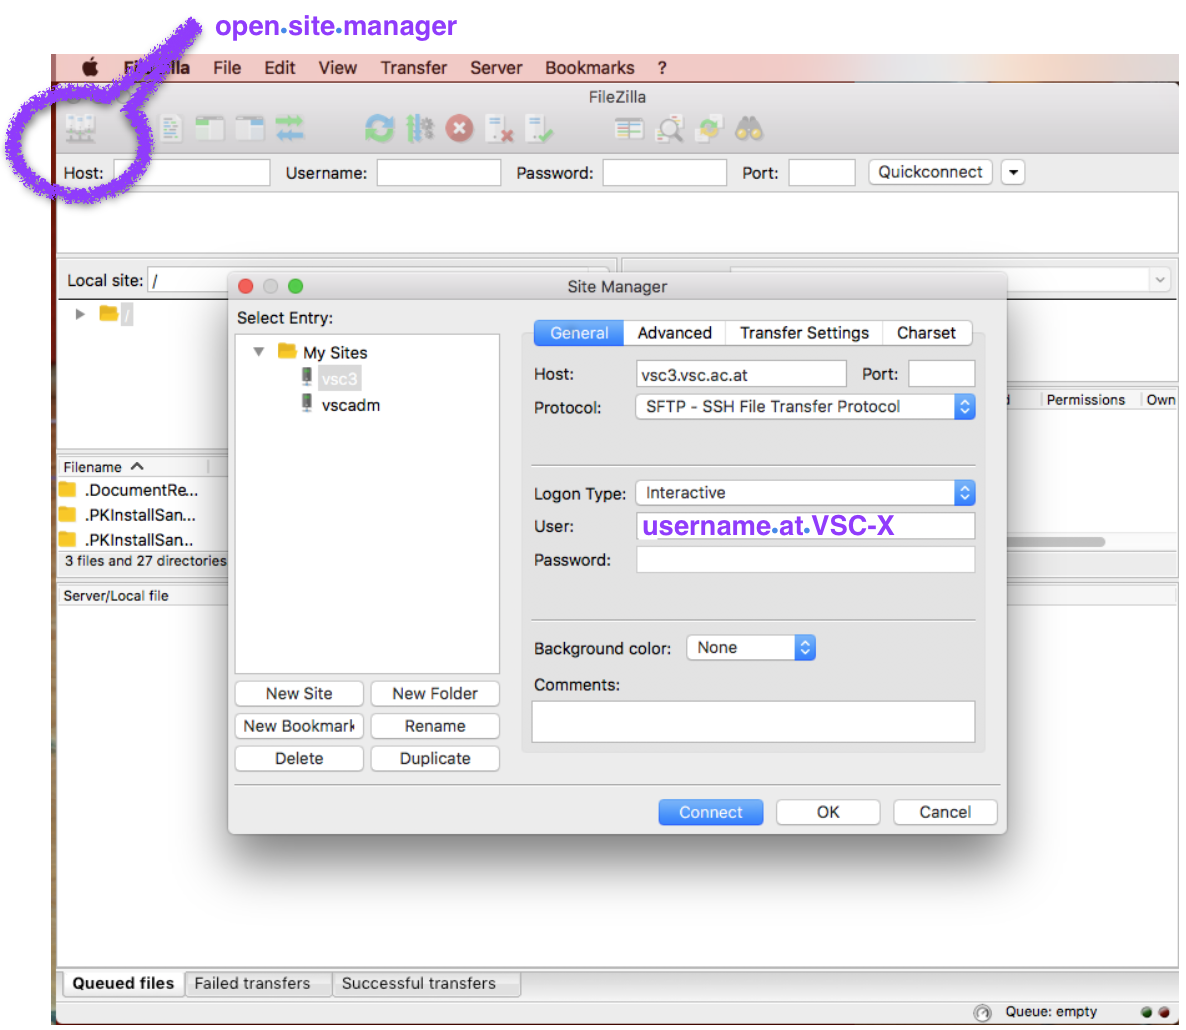
Files can be transferred to your home directory on the cluster using the tool FileZilla. Due to the two-factor identification, “quick connect” does not work and the connection has to be established by means of the site manager, the icon of which is located at the top left side of FileZilla (compare Figure 1.a). In the first window
- server name (VSC 3: vsc3.vsc.ac.at, VSC4: vsc4.vsc.ac.at)
- port: 22
- user name: which you have created on VSC, and
- Logon Type needs to be set to: interactive
have to be specified. After clicking the button “connect”, you will be asked for the
- password: which you have created on VSC,
- and the OTP.
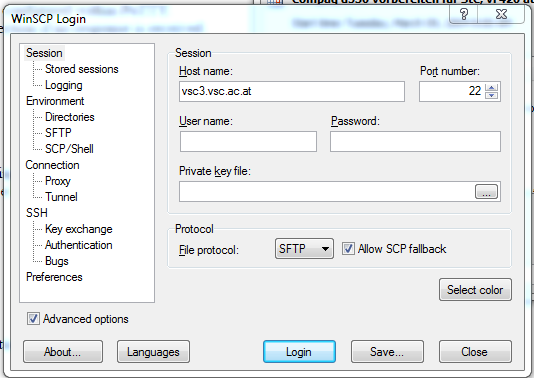
Alternatively, you may use winscp, see also Figure 1.b:
- host name (VSC 3: vsc3.vsc.ac.at, VSC4: vsc4.vsc.ac.at),
- port: 22,
- user name and password can be skipped here and provided later together with the OTP.
Figure 1.a: FileZilla. VSC-3: vsc3.vsc.ac.at | VSC-4: vsc4.vsc.ac.at.
Figure 1.b: winscp.
Terminal connection
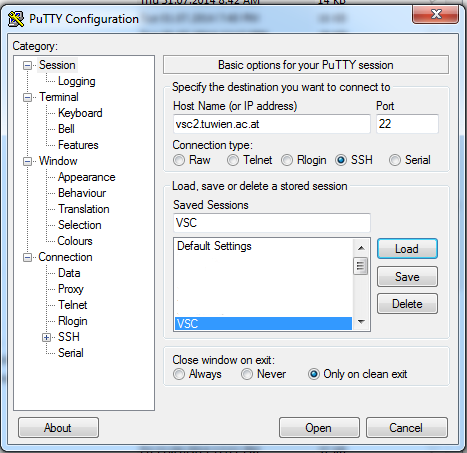
A terminal connection to the cluster opens on your windows machine by taking advantage of the tool PuTTY. PuTTY, compare Figure 2, requires
- host name (VSC 3: vsc3.vsc.ac.at, VSC 4: vsc4.vsc.ac.at),
- port: 22,
- connection type: SSH,
after clicking open you will be asked for your user name, password, and OTP.
Here, the usual linux commands apply, e.g.,
[<username>@l21 ~]$ pwd              [gives back the current path]
[<username>@l21 ~]$ ls               [lists all directories and files which are in the directory]
[<username>@l21 ~]$ mkdir <dir>      [make directory]
[<username>@l21 ~]$ cp <a> <b>       [copy  <a> in <b>]
[<username>@l21 ~]$ mv <a> <b>       [move  <a> in <b>]
In this terminal, your application can be (re-)compiled. Batch jobs are submitted under SLURM.
Figure 2: PuTTY.
The job file: text editors on the Cluster
Create a job file as described in the section Submitting batch jobs (SLURM). You have to submit a remote job, it is not allowed to run your application directly on the login nodes.
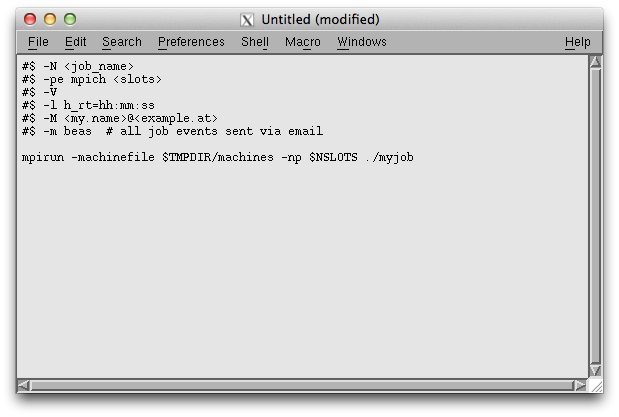
Editors in Windows may add additional invisible characters to the job file which render it unreadable and, thus, it is not executed. It can be quite cumbersome to find and remove these additional characters. Therefore, it is advisable to write the job file directly on the VSC linux cluster. Available editors on the VSC include NEdit, see Figure 3. NEdit opens if you enter
[<username>@l41 ~]$ nedit & [+ return]
on the command line. This editor works similar to ms windows applications. Note: You have to connect via X-forwarding to use it The & is used to open the application in the background and to be able to continue to work in the terminal. Alternatively to NEdit the vim editor may be used. The command
[<username>@l41 ~]$ vim <job_myjobname> [+ return]
calls the application vim and the file <job_myjobname> is opened if it exists already, otherwise it is created. vim in general has 2 different modi, one editing mode where you can write and a command mode. A file is always opened in command mode. There are several commands to switch to the editing mode, e.g., typing the letter i switches to insert or R to replace. A more detailed documentation to vim can be found in vim. In order to switch from editing mode to command mode, the esc key has to be hit. The editor can be quit in command mode by, e.g., :q! (file is not saved) or :wq (file is saved).
At first sight, vim does not seem to work intuitively, however, once one is used to it, it is a very powerful program which allows for faster file manipulation than with a graphical editor. Here, a quick vim reference manual can be found.
Figure 3: NEdit.


